Is your delta shower head not exerting a decent water flow as it used to? Are you obsessed with its low flow and want some solution for it?
It’s a common problem these days for houses with low water flow from pipes. Besides, a flow restrictor in a shower head puts salt on the pain by decreasing the water pressure more, resulting in a trouble bath experience.
Fortunately, delta shower heads have removable flow restrictors that you can take out to let the showerhead show its real strength.
And to help you out in this endeavor, this guide will explain everything you need to know about how to remove flow restrictor from delta shower head in the simplest way possible.
Once you read this guide, taking out a flow restrictor will become a piece of cake for you. So, without further ado, let’s get straight into it.
What’s The Purpose of Flow Restrictor In Delta Shower Head, and When Do You Need To Remove It?
Flow restrictors, also known as water restrictors, are designed to maintain the water flow of showerheads within the limit of 2.5 Gallons Per Minute. They help save water and lessen water bills.
But, at the same time, they can decrease showerhead flow if the residence pipes have low water pressure. So, if you’re facing the same problem with your showerhead, you may need to remove the flow restrictor to increase the water pressure.
Moreover, flow restrictors can sometimes get clogged when limescale and mineral buildup accumulate inside the showerhead because of hard water. In this case, their removal becomes necessary to restore the showerhead’s former glory.
If you’re looking for some best Delta shower heads, we have featured some top products below for your ease.
How Do You Remove Flow Restrictor From Delta Shower Head? [Step-By-Step Guide]
Honestly speaking, removing the flow restrictor from the delta shower head is as easy as screwing a bulb in the holder. All you need is the right guidance, and you will easily remove this peaky thing from the shower head in no time. Moreover, it will hardly take 5 to 10 minutes to complete the task.
So, let’s take a look at the steps below to know how to remove the flow restrictor from the delta shower head.
Required Things
You need to get some tools to make the task a low-hanging fruit. Many of them will be found around your house, so you don’t need to go the extra mile to gather them.
- Plumbers or Teflon tape
- Adjustable wrench
- Needle-nose pliers
- A Paper clip
- Tooth Brush
- Soft Cloth
Step 1: Turn Off Water Supply First
Of course, you don’t want yourself to be drenched in water while removing the showerhead. Be sure to cut off the water supply first to secure yourself from any misadventure. It will also help simplify your task by filtering out the involvement of water.
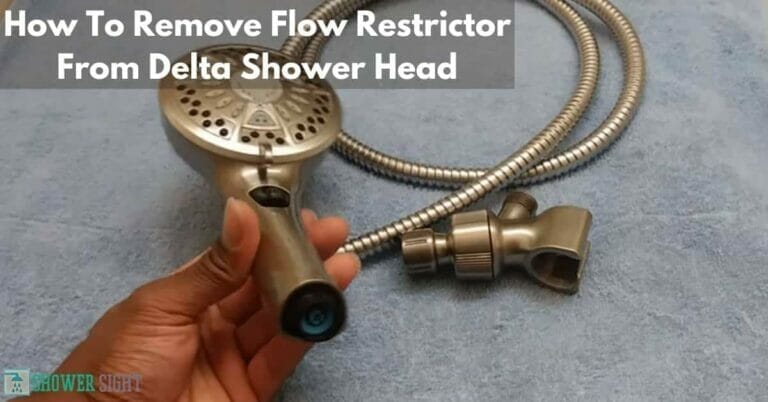
Step 2: Detach The Shower Head
To remove the flow restrictor, you must detach the shower head from the pipe or connector. Remember the soft cloth you gathered? You need to use it to protect the shower head and connector from possible scratches while disassembling.
Use the wrench to rotate the showerhead in the anti-clockwise direction from the area it is connected with the connector to remove the shower head. Don’t forget to wrap the cloth around the things while following the process. It will also help to provide a solid grip.
Step 3. Remove The O-ring Gasket
After successfully disassembling the showerhead, find the O-ring Gasket inside it. You may need to use a flashlight to locate it inside the showerhead.
The paper clip is the best tool to take it out; just a little pinch can do the job. After removing it, secure it in a safe place because you will need it later.
Step 4. Take Out The Flow Restrictor
You will find a thing shaped circular and fitted right inside the center of the delta showerhead. This is the flow restrictor that stops your way from taking extreme showers; you need to take it out to revive your fun.
Needle nose pliers will help you remove the water restrictor in no time. Just pick it, use a little push and boom, it will come out.
Step 5. Clean The Shower Head
If your showerhead is dirty and has buildup on its surface, that’s the best time to clean it. Why? Because it is disassembled and you can clean it thoroughly without much effort. Otherwise, you can skip this step.
Step 6. Wrap Things Up
Put the things back in their place to make the showerhead run again. Carefully place the O-ring Gasket or washer in its required place and fix the shower head again with its water source.
Use Soft cloth again to ensure no scratches will be left on the showerhead surface while fixing. Turn the showerhead in the clockwise direction to connect it back to the pipe and shower arm.
Don’t forget to use the Teflon tape on the threads of the hose before attaching a Delta showerhead.
Step 7. Run A Test
Lastly, turn on the water supply of the showerhead to check everything is working as planned. Unfortunately, if you find leakage on the showerhead, you need to make the connections tight with the wrench again.
The best part is your Delta showerhead water issue will be resolved, and nothing can stop you now from enjoying a comfortable shower.
Check The Expert’s Reviews On Best Handheld Shower Head With On Off Switch
How To Adjust Water Pressure On Delta Shower Head?
Delta showerheads are best for adjusting water pressure according to your desire. This is because other showerheads lack this feature and simply don’t allow the water flow to change.
If you don’t know how to adjust the water pressure on the Delta showerhead, let’s follow the steps mentioned below.
Step 1: Locate the Knob on the side or top of the delta showerhead. This is the real player to set the water pressure as per your wish. Turn it on to let the water flow control at your fingertips.
Step 2: Turn the knob counterclockwise to increase the water to an extreme level.
Step 3: Similarly, turning the knob clockwise will help to decrease the water flow.
What Are The Pros And Cons Of Removing Water Restrictor From Delta Shower Head?
Pros:
- It increases showerhead water flow to an extreme level.
- The showerhead pressure will not decrease even if it’s receiving low-flow water from pipes.
- It allows you to use the water according to your desire.
- You can freely use all spray settings of the showerhead.
- It will take your shower-taking experience to the next level.
Cons:
- It will lead to an increase in water wastage and water bills.
- Taking out the flow restrictor can result in the non-conservation of water.
Final Verdict
Flow restrictors are the savior of increased water bills and water wastage. If you remove it from the Delta shower head, you may face the trouble of paying high water bills and breaking the law if you live in a drought area. It’s imperative for you to know the consequences of this act.
On the other hand, you will enjoy extreme water flow from the showerhead, regardless of the house pipes’ low water flow. It will break the chains, and you will never face issues regarding water pressure from your Delta shower head.
Fortunately, everything you need to know about How To Remove Flow Restrictor From Delta Shower Head has been described in this article. You can follow the simple steps to make your showerhead run like it was before.
Was this helpful for you to remove the water restrictor from the Delta showerhead? Let me know in the comments if you have any questions.
Read More: How To Remove A Shower Head That Is Glued On