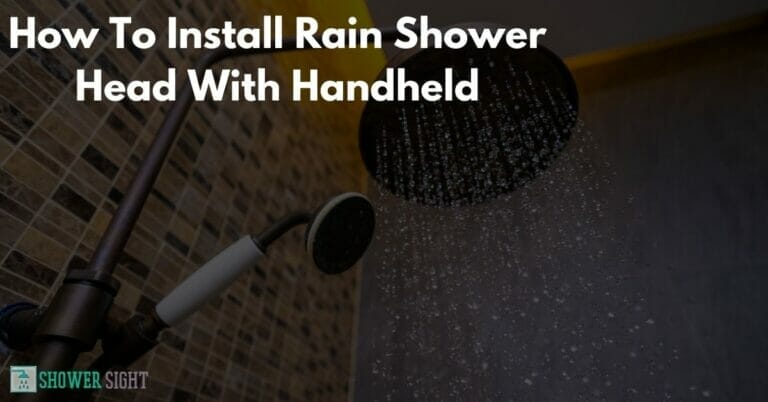
Both handheld and rain shower heads have different features and comforts. The handheld showerhead assists you with taking a quick, comfortable shower, while the rain showerhead brings a “dancing on the rain” “-like experience at home.
However, combining both makes something immense which Rain Shower Head With Handheld. Fortunately, this guide will explain everything about how to install a rain shower head with handheld.
It will walk you through every step of installing a rain shower head to ensure you get the job done in no time. So, without further ado, let’s get started.
How to Install A Rain Shower Head With Handheld? [Step-By-Step Guide]
What you need
Tools will assist in converting your DIY task into a low-hanging fruit. So, don’t forget to gather all the tools mentioned below before following the installation process.
- Rain showerhead
- Handheld showerhead
- 3-way shower diverter
- Adjustable Wrench
- Extension Arm
- Teflon tape
Tip: If you purchase a dual showerhead set, you will get all the required installation things along with it. So you don’t have to buy anything separately.
Step 1. Cut Off Water Supply
First and foremost, you have to turn off the water supply of the showerhead from the main source.
This is an important step because if you don’t do that, you will get drenched in water once you remove the showerhead.
So, make sure to turn off the water supply first before installing a shower head.
You can turn the supply from the water valve, which can be found:
- Under the sink
- In the basement, just below the bathtub
Step 2. Remove The Old Shower Head
This step involves removing the existing shower head so you can install a new one in its place. The adjustable wrench and pliers can help you accomplish this task.
But first, you have to try removing it with the force of your hands. If it does not come out, you can use other tools for help.
Take the wrench and fasten it to the place where it is connected to the shower arm. Rotate it in the anticlockwise direction, and it will come out easily.
Use a smooth approach instead of a harsh one while using the tools. Be sure not to damage the finish of the shower.
Step 3. Installing the Rain Shower Head With Handheld
You need to know that you will be installing two shower heads in place of the existing shower.
The Rain shower head with its extension and handheld shower head will install on the 3-way shower diverter. The 3-way shower diverter holding both showerheads will be fixed with an overhead shower arm.
Now, let’s see how you can install a rain shower head with a handheld.
First, you need to attach a 3-way diverter with the overhead shower arm. Before fixing, don’t forget to wrap the Teflon tape on the shower arm threads.
Secondly, you have to attach a rain shower head extension arm and handheld shower hose with the fixed diverter on the shower arm.
Attach the hose with your handheld showerhead by rotating it in a clockwise direction.
The last step is to install the rain shower head to its extension. You can also install a showerhead with an extension before fixing it on the diverter.
Once you do it, congrats, your dual shower head system has been successfully installed. You can now enjoy the benefits of both types of showerheads in your shower.
Step 5. Test The Installed Dual Shower Head
Do a Test run of the showerhead system by turning on the water supply. Make sure that everything is running smoothly and according to plan.
If you find leaking anywhere in the showerhead system, tighten that area using the wrench. If you don’t get the desired results with tightening, try reinstalling that leaking part again.
Step 6. Clean Up The Mess
It’s time to clean up the mess that has been created during installation. Place all things in their required place and leave nothing behind.
Lastly, wipe the showerhead and other surfaces that may have been affected during installation with a damp cloth. It will help restore their former glory.
You May Also Like: How To Fix A Shower Head That Sprays Everywhere
Frequently Asked Questions
Is It Easy To Install A Rain Shower Head With Handheld?
In simple words, I could say it is as easy as screwing the bulb in the holder. It is only possible if you have detailed knowledge of how to do it.
Fortunately, this guide can help you achieve this feat. You can follow the steps mentioned in this article to make installing a rain shower head a handheld piece of cake.
How Do I Take Care Of My Rain Shower Head With Handheld?
To maintain the glory of your dual showerhead for a long time, you can follow the steps mentioned below:
- Rinse it with water after each use
- Wipe it with a wet, damp cloth after two or three days
- Clean it using vinegar and other things at least once in two weeks
- Avoid using harsh chemicals on showerheads for cleaning
- Hold the handheld showerhead while using it to prevent it from falling
- Regularly check connections for leakage and tighten them if necessary
How To Install A Rain Shower Head To An Existing Shower?
First, you have to remove an existing shower with the help of a wrench. Twist it in the anticlockwise direction, and it will be removed easily. Now, wrap Teflon tape around the threads of the overhead shower arm.
Lastly, install the rain showerhead with an arm by rotating it clockwise. Run a test by turning on the water supply to check leaks and working.
Conclusion
Installing a rain showerhead with a handheld is not as difficult as it seems to be. Having a thorough knowledge of the task can make it as simple as putting a lid on the bottle. That’s what I have aimed to provide you with in this article.
I hope it helps in giving you a deep insight into how to install a rain shower head with a handheld. If yes, also check other interesting posts on my blog. If you have any questions, don’t hesitate to ask them in the comment box below, I would love to answer them.
Until Next Time!!!