Handheld shower heads provide uncountable benefits to ease your showering endeavors. It gives on-the-spot showering to each body part and is highly beneficial when you have to bathe kids or a family dog.
However, the only area where people fail is installing it to the existing shower. Let me tell you; installing a handheld shower head is nothing more than a piece of cake.
You just need the right guidance and support, and this comprehensive guide will never disappoint in providing it to you in the simplest way possible.
Without further ado, let’s take a look down to learn how to install a handheld shower head.
What Are The Different Methods Of Installing A Handheld Shower Head?
Here is the twist.
You can install the handheld shower head with three different methods. Choose the one that suits you the best.
Using A Standard Diverter or Base:
This is the most popular method used to install handheld showerheads. It helps replace an old showerhead with a handheld showerhead using the standard diverter or base.
Using A Cross-Tee Diverter Fitting:
If you want to install a handheld showerhead without removing the old showerhead to use both while showering, this method is what you need.
The cross-tree diverter has two outlets, one for holding the hose and handheld showerhead and a second for connecting the original showerhead.
Using A Tub Spout Diverter Valve
If you’re unfortunate enough to have an existing shower to install a handheld showerhead, then the tub spout diverter valve comes into play. It replaces the old tub spout with a new one with a handheld shower diverter.
What Equipment You Should Gather To Change A Shower Head?
Did you choose the method for installing a handheld shower head, keeping your needs in mind? If yes, you’re ready to proceed further.
But, you will need tools too that help make installation a low-hanging fruit.
Here you don’t have to go the extra; just gather the tools mentioned below, and you’re good to go.
- Handheld shower head kit including hose, showerhead, a diverter (mounting bracket, cross-tree diverter, tub spout diverter valve), etc.
- Teflon tape
- Wrench
- Adjustable Pliers
- Soft Cloth
Before Getting Straight Into The Installation Process, First You Need To…….
Removing the old showerhead is what you need to do first before installing the handheld showerhead.
Skip this step if you don’t have an existing shower and want to install the handheld showerhead through the tub spout diverter valve.
Would you like to see yourself drenched in water after removing the old showerhead? So, first, you must cut off the old showerhead’s water supply through the source.
It is imperative to cover the old showerhead with a cloth while disassembling it. (if you care about it and don’t want any scratches over it)
Afterward, rotate the showerhead in the anticlockwise direction with a wrench from a point connected to the shower arm. If it is loose enough to come out with hand power, you don’t have to use any tools.
Don’t apply too much pressure, as there are chances you may break the shower arm. To avoid this, plumbers recommend using a scissor bit with two wrenches, a technique they call “holding against ourselves.”
Once the old showerhead is successfully removed from the shower arm, you can follow the steps below to install a handheld showerhead over its place.
How To Install A Handheld Shower Head With A Standard Diverter or Base?
After disassembling the old showerhead, remove the Teflon tape from the threads of the shower arm and clean it with a cloth.
Wrap a new layer of Teflon tape on the threads to support the new connection. This will prevent leaking and firmly connects two things.
Having said that, let’s take a look down to learn installing a handheld showerhead with a standard base.
Step 1. Attach Standard Base To The Shower Arm
You must attach a standard diverter and base to the shower arm. For that, you need to twist the base on the threads of the shower arm in a clockwise direction.
You can take the help of tools here, but it can be done smoothly using your hands.
While attaching the showerhead base, keep the mounting bracket on top and the shower hose connector below the shower arm.
Step 2. Connect Hose To Base
Cover the exposed threads of the shower base with Teflon tape and attach the showerhead hose by twisting it clockwise.
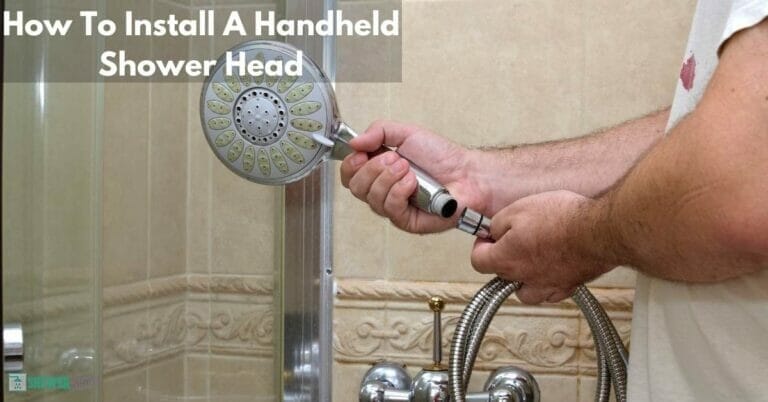
Step 3. Attach The Shower Head
Connect the showerhead to the other end of the hose attached to the shower base. Turn on the water supply to check for leaks, and if you find any leaks tighten that area using the wrench.
Once everything is done as planned, you can slot the showerhead on the base’s mounting bracket.
How To Install A Handheld Shower Head With A Cross-Tree Diverter Fitting?
This method involves attaching a cross-tree diverter to the shower arm that can hold both the existing shower head and the handheld shower head. It helps let you enjoy showering with two showerheads in one place.
Step 1. Attach A Cross-Tree Diverter
After removing the old showerhead (see above), attach a cross-tree diverter to the shower arm by twisting it clockwise. Don’t forget to apply the Teflon tape on the threads of the shower arm before doing this.
Step 2. Reconnect the Wall-Mounted Showerhead
Wrap the loops of the Teflon tape on the threads of the cross-tree fitting. After that, screw the wall-mounted showerhead clockwise to one of the outlets.
Step 3. Install The Flexible Hose
Attach the shower head hose to its outlet on the cross-diverter. Tighten it with your hands without using tools. Install the showerhead to the other end of the hose and slot it onto the mounting bracket.
Don’t forget to run a test to check for leaks and ensure everything is done as planned.
How To Add A Handheld Shower With A Tub Spout Diverter Valve?
When you don’t have an existing showerhead, the tub spout diverter will help create a space for a handheld showerhead in your bathroom. It requires replacing the old tub spout with a new one that has a diverter fitting.
Step 1. Remove the Old Tub Spout
First and foremost, you need to remove the old tub spout.
- On the other hand, If your tub spout doesn’t have a setscrew, it is a threaded type. In that case, unscrew the spout anticlockwise with the help of channel-lock pliers until it removes from the stub-out pipe.
- If you find a hex-head (Allen) setscrew on the old tub spout, it is a slip-on type. After that, you must lose the setscrew with a hex key (Allen wrench) and slide the spout off the stub-out pipe from the wall.
It is recommended to seek help from a professional if you find this task difficult to do yourself.
Step 2. Install A New Tub Spout
Once you have successfully removed the old spout, it’s time to install a new one in its place that has a diverter fitting.
First, buy a new spout that uses the same attachment as the old one: threaded or slip-on.
- If your tub spout is threaded, cover the pipe with two or three loops of Teflon tape, then twist it onto the sub-out pipe.
- On the other side, if your spot is slip-on, slide it over the stub-out pipe and fasten the setscrew with a hex key.
Step 3. Mount the Slide Bar
In this step, you need to mount the slide bar of the handheld showerhead to the wall, following the instructions mentioned in the manufacturer’s guide. The process may include making holes in the wall and anchoring the bracket with expandable anchors.
Step 4. Install the Flexible Hose
Fasten the flexible hose to the threads of the spout’s diverter valve. Don’t forget to wrap the Teflon tape on the threads to prevent leaking and making firm connections.
Now, attach the showerhead to the other end of the hose and slot it on the bracket or slide arm.
Don’t forget to run a test to check for leaks and ensure everything is done as planned.
Bottom Line
Installing a handheld showerhead to an existing shower is not as difficult as it seems. It is a matter of minutes if you have the right guidance to install it.
Fortunately, to provide you with that, this guide has explained everything you need to know about How To Install A Handheld Shower Head.
It is recommended to read this article twice for a better understanding of things. I hope you like this article; if yes, don’t forget to sneak into other useful blog content.
You can ask questions below; if any, I would love to answer them.
Until Next Time!!!