Shower pans can develop cracks and leak water into the subfloor as they age. If this happens, the only viable solution is to replace the shower pan. However, removing a shower pan without damaging the surrounding wall tiles can be challenging.
But nothing is impossible unless you know how to do it. Let’s take a quick glimpse into it.
To replace a shower pan, you need to start by opening up the lower layers of the shower wall. Then, loosen the shower pan and disconnect the shower drain. This will allow you to remove the old shower pan without causing damage to the surrounding area. Now, position the new shower pan on the shower floor, connect it to the drainage, and fix it on the floor.
As a side note, If you lack experience with shower pans, mixing mortar, or other DIY skills, it’s best not to attempt a shower pan replacement project alone. The best way would be to call a plumber instead.
How Do You Replace Shower Pan Without Removing Tiles: Step-by-Step
I have explained a step-by-step guide below to help replace the shower pan without removing tiles. But first, you gotta need the tools first to make your whole installation process easy peasy. Here are their names.
- Reciprocating saw,
- Pry bar
- Screwdriver
- Pliers
- Hammer
- Utility knife
- Drill (optional)
Step 1. Access the lower layers of the shower wall
To gain access to the shower pan, you’ll need to open up the lower layers of the shower wall. This involves removing the baseboard, drywall, and ceramic tiles.
Underneath these layers are the wainscoting, center support beams (if it’s a framed shower), and studs that make up the lower parts of the wall.
Using a reciprocating saw, carefully open up these three layers to expose the shower pan. It’s essential to be cautious and avoid cutting any wires or pipes in the wall while doing this.
With patience and attention to detail, you can successfully open up the lower layers of the shower wall and gain access to the shower pan for any necessary repairs or replacements.
Step 2. Take off the drywall.
First, grab your trusty pry bar and carefully pry the drywall away from the tub. Look for the studs on top of the tub that you can use to pull up the drywall.
Once you’ve pulled it away, remove all the screws on the face of the drywall holding it onto the studs.
But wait, there’s more! Sometimes you’ll encounter an extra layer of sheetrock that keeps your shower wall flat and waterproof.
Don’t panic – use a sander to remove all the surface paper from this extra-thick sheetrock. This will help it absorb water more effectively when you pour concrete into your shower pan later.
Step 3. Remove adjacent tiles from around the shower pan
Grab a pry bar and remove the corner tile beside the shower pan. Be sure to scrape away any adhesive and clean it well with water and TSP to ensure it’s prepped and ready to go.
Here’s a pro tip: don’t remove any more tiles than you need to. Look at the wall and see how high up you can work to get the shower pan freed.
If you can do it with just one layer of tiles removed, that’s your sweet spot. It’ll save you time, effort, and frustration.
Step 4. Clear away any debris
While renovating your shower area, cleaning up the debris is a crucial step that cannot be overlooked. It will help prevent accidents, such as tripping over cluttered debris, and prevent dirt and debris from entering your new work area.
Gather and dispose of all debris in a designated area to avoid tracking it back into your freshly cleaned space. Trust us, taking a few extra minutes to clean up now will save you time and frustration later on!
Step 5. Loosen the shower pan
Once you’ve thoroughly cleaned the shower, the first step is to loosen up the existing shower pan. To do this, use a hammer and chisel to gently tap around the perimeter, breaking up the cement and caulk that holds the pan in place. This will make it easier to remove the old pan.
Next, remove all the screws that hold down the damaged or rusty shower base. If any nails are underneath, use a pry bar to pry them out gently. Once this is done, you should be able to remove the existing pan with ease.
Removing your shower pan with silicone caulk can be a bit more challenging if your shower pan is sealed. In this case, use a heat gun or hairdryer to soften the sealant, making it easier to scrape away and separate from any metal surfaces underneath.
Step 6. Disconnect the shower drain
To prevent any damage to the drain or other parts of the floor, it’s essential to disconnect the shower drain from the shower pan.
This process may differ depending on the model of your shower. Still, it generally involves removing a small round cover on the top of the drain or unscrewing a clamp at the bottom that fits around the shower drain pipes and prevents water from seeping into the floor.
To do this, use a flathead screwdriver to remove both clamps and set them aside so you can easily access and reattach them later if necessary.
Step 7. Take off the drain cover and grommet
Now it’s time to remove the gasket. If any screws are holding it in place, remove them first. Then, take your trusty utility knife and carefully cut through the sealing material around the gasket. Be sure to exercise caution and avoid any accidental finger-slicing mishaps.
Sometimes, gaskets can be stubborn and refuse to budge, requiring you to pry them up with a flathead screwdriver or putty knife. Once you’ve loosened the gasket, use a bit of elbow grease to remove all the sealant around the drain hole.
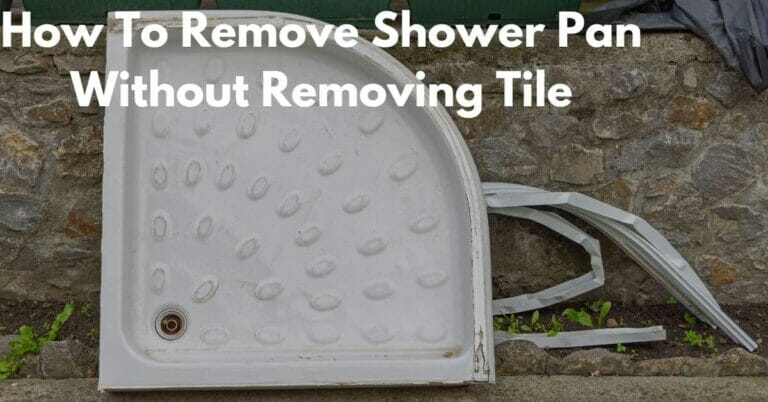
Step 8. Remove the old shower pan
It’s time to tackle that pesky tile caulk around the shower pan. Get ready to flex those muscles and bust out your trusty pry bar.
But hold up! Before you go in full force, remove any plumbing fixtures like faucets or handles. It’s like giving your shower a mini-makeover while you’re at it.
Once that’s done, let’s return to the task. Start by removing the tile caulk from around the shower pan. It’s not glamorous, but someone has to do it.
Then, slide that trusty pry bar under the pan and give it a gentle lift. But beware, some suckers can stick in place, so proceed cautiously.
And voila! With some elbow grease and finesse, your shower pan should be ready to come out like a champ.
Step 9. Install the new shower base
Now, let’s get this shower back in business! The first order of business is to swap out that old shower base for a shiny new one. Start by clearing a tile section around the drain to get to the underlying structure.
Then, carefully follow the manufacturer’s instructions for cutting out the damaged sections of grout and sealant and replacing them with fresh new materials.
Next, ensure you have correctly aligned the shower drain with the cutout on the shower pan. You don’t want any water leakage ruining your brand-new setup!
Finally, it’s time to connect the pop-up drain assembly you took off earlier, so you can say goodbye to any potential shower drain disasters.
Step 10. Cover the walls to finish.
It’s time to get those shower walls back up and ready for action! Carefully flip them over and slide them into place. If you find any damage, don’t panic.
You can always grab new ones at your local home improvement store. Just ensure to notch around pesky pipes and replace broken tiles.
Now for the finishing touches. Apply a generous amount of silicone caulking along the edges where the walls meet the floor.
And don’t skimp on the sides, either! Then, pop that tile section back into place, and voila! Your shower is as good as new. With that silicon sealant, you won’t have to worry about pesky moisture seeping through those joints.
What Are The Differences In Replacing Fiberglass And Tiled Shower Walls
Say goodbye to your old and damaged shower pan! But before you start the removal process, you must know the type of shower wall you have to determine the best method.
Fiberglass shower walls
Ah, the infamous fiberglass shower pan liner – it can be a tricky little devil to remove from the floor without causing any collateral damage to your lovely bathroom tiles. But fear not, for there is a way to get it done!
Unlike tiled shower walls that use caulk, fiberglass panels are made by pouring fiberglass material into a mold to create a liner that fits over the subfloor. Since removing caulk is not as easy, we must use a different approach.
First, you’ll need a saw to cut the fiberglass shower wall pan from the floor. It’s vital to cut close to the perimeter of the drain, where a copper pipe should be protruding after removing the shower pan.
Next, cut holes in each edge where the angle cuts meet, so the bottom of the new tub will sit on top of the holes. A reciprocating saw with metal blades is ideal for this task, but if you don’t have one, fear not – you can rent one or borrow it from a neighbor (or use some elbow grease and a hand saw if all else fails).
With these tips, you can successfully remove your fiberglass shower pan liner without any unwanted damage.
Tiled shower walls
The caulk between the tiles and the shower pan must go if you have tiled shower walls. Don’t worry; a simple knife will do the trick. Once that’s taken care of, it’s time to disconnect the drain from the shower pan and give the pan an excellent pry to get it out of the shower floor.
Now, if your shower walls are tiled, there’s a good chance you have an extra layer of waterproofing membrane between the tiling and the shower pan.
This is usually the case in commercial installations where extra waterproofing is needed. Tiling is no joke; it takes a lot of hard work and patience to get it done right. But in the end, it’s worth it for that nice, polished look.
FAQs Related To Replacing Shower Pan Without Removing Tiles
When should I replace my shower pan?
If you notice any cracks, leaks, or significant wear and tear, it’s time to replace the shower pan. A damaged shower pan can lead to water damage and mold growth, so it’s better to be safe than sorry. Look for any signs of damage and address them promptly to avoid more significant problems.
Can you put a shower pan over the existing tile?
Yes, installing a shower pan over the existing tile is possible. However, ensuring that the tile is adequately cleaned and prepared for installing the shower pan is essential. Choosing a shower pan suitable for this installation that will adequately adhere to the tile surface is also essential.
Can you remove the shower floor tile and replace it?
Yes, you can remove the shower floor tile and replace it. However, the process can be tedious and labor-intensive, so hiring a professional is recommended if you’re not experienced with this type of work.
What is the difference between a shower pan and a shower base?
A shower pan and a shower base are the same things. They both refer to the waterproof bottom layer of a shower that collects water and directs it to the drain. The terms can be used interchangeably.
Hey Abdul
I need to replace my 36X36 Shower tray with a new one however I notice the previous installation was a 35X35 however the stud to stud opening is 36X36 which means the previous guy had to slant the bottom tile by 1 inch to close the one inch gap. How can I go about this I can knock off the lower tile and get a new 36X36 tray . Let me know your thoughts