The Shower Base/Pan/Tray not only provides room for a smooth shower experience but also helps protect your floor from water intrusion, rot, and mold. However, installing one on the floor is not everyone’s piece of cake, especially on a wooden floor.
But no task is difficult until you know how to do it. And that’s what this guide is supposed to do. It will take you through each detail which will for sure help make your shower tray installation process on a wooden floor a low-hanging fruit.
Installing a shower base on a wooden floor is a straightforward process. First, you’ve to make measurements and carefully cut out that wooden part from the floor. Now, make connections for the waste pipe and drain, and finally, once everything is done, place the shower base on the subfloor and seal the edges with adhesive glue.
By now, you must understand how to install a shower base on a wooden floor. This is just to make up your mind and to get started with installation; the real treasure lies below.
We have given a step-by-step guide below, which will give a detailed insight into installing a shower base on a wooden floor. Read on to get your queries solved.
Without further ado, let’s get started.
7 Easy Steps On How To Install a Shower Base On a Wooden Floor?
Required Tools
Here are some tools that you’ll need to make your shower pan installation process nothing more than a piece of cake.
- Drainage pipes
- Screws
- Tape measure
- Pencil
- Adhesive Glue or Sealant
- Silicone
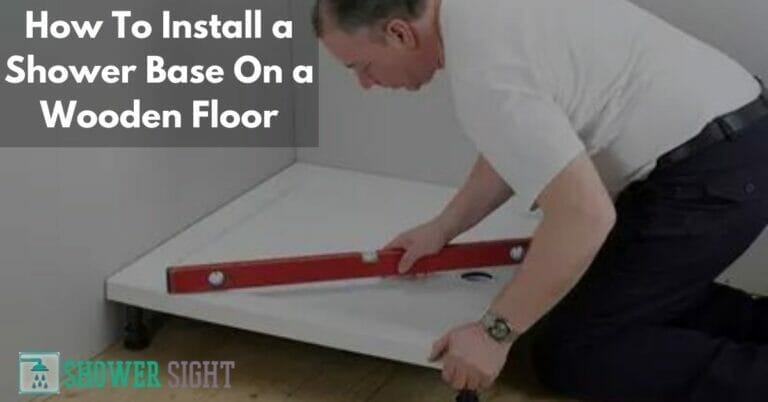
Step 1: Level the Floor
Before getting straight toward the shower pan installation process, you need to clean and level the floor. Clean any dirt and debris on the floor and ensure it is level. This is necessary because a dirty and unlevel floor will do no favor but increase pain while bedding a shower tray.
Step 2: Take Measurements
The first step comes with making the right measurements of the place where you have to install the shower base. Place the shower base on the floor and make the markings using a pencil. This will give you a visual to follow when cutting the floor.
Step 3: Cut out the Floor
Once you make the measurements, it’s time to cut out the marked place from the floor. Use a circular saw to cut the floor evenly from all sides. Be careful not to cut into the floor joist below.
Step 4: Install the Pipe and Drain
Of course, you have to make arrangements for adequate shower water drainage. For that, you need to install pipes under the floor to ensure smooth water drainage toward the sewerage system.
While installing drainage pipes, make sure it is equal to the top of the floor joists. If, for some reason, they’re not evenly colliding with the floor, you can use the piece of wood under the drain pan to make them do so.
Adding extra support along the wall between the existing boards is also a good practice. Use the glue to stick the additional boards to the wall horizontally between the existing joists.
Step 5: Install The Shower Base On The Floor
Now the step comes that you’ve been waiting for quite a long time. To secure the shower base, first, you have to apply the adhesive around the edges and then stick it on the floor. You can see screw slots on the base, fix them and apply more adhesive over the screws.
Step 6: Seal Around the Edges with Silicone
To ensure the shower tray is firmly attached to the floor and won’t break in the future, you have to seal the edges with silicone adhesive. Clip the drain cover into place, and boom, you’re done. Lastly, you can tile over the tray if you desire.
Check out this video for a step-by-step visual guide on installing a shower base on a wooden floor.
Do I Need The Mortar Base Under The Shower Pan?
If you have a wooden floor, Using the mortar base under the shower base is unnecessary since they’re meant to apply over the concrete floor for fixing purposes. However, they’re the best choice for installing a shower base on a concrete floor. For wooden floors, adhesive and sealant are perfect for fixing a shower pan.
Do I Need To Waterproof Under The Shower Pan?
It is not necessary to waterproof under the shower pan, but it is considered good practice to waterproof it by putting a water liner before putting a shower pan on the wooden floor.
There is no need for a liner in the process mentioned above because we used silicon to prevent water from making its way below the pan.
How Do You Level The Floor For A Shower Base Installation On A Wooden Floor?
To level the floor, first, you have to make sure it is cleaned from all sides. To do that, use a vacuum to scrub off rising surfaces such as dirt or leftover glue. If needed, use a hammer to knock off extra hard surfaces that were left behind by the old shower pan.
Once you do it, use the flat-level indicator to check whether the floor is level or not. If it shows the floor is level, you have done a great job, but there is more work for you if it doesn’t. You have to follow the same process until you won’t reach the middle level of the indicator.
Frequently Asked Questions
Can you put a shower tray straight on the floorboards?
Yes, you can install a shower tray directly onto the floorboards. However, using a suitable shower tray base or support is generally recommended to ensure stability and prevent flexing or sagging of the floorboards over time. This base or support can be made of materials like plywood or cement board and provides a solid foundation for the shower tray, ensuring proper drainage and preventing water damage to the floorboards.
How do you install a shower tray on a wood floor?
To install a shower tray on a wood floor, begin by preparing the floor, ensuring it’s clean and level. Create a support base using plywood or cement board, securing it firmly to the floor. Test fit of the shower tray and make necessary adjustments for proper alignment. Connect the drain following the manufacturer’s instructions, ensuring a tight connection. Seal the edges with waterproof sealant or silicone caulk to prevent leaks. Finally, test the tray for leaks and proper drainage.
Do you need to put anything under a shower base?
It is recommended to put a support base under a shower base. This support base, typically made of materials like plywood or cement board, provides stability, prevents flexing or sagging, and ensures proper drainage. It also helps distribute the weight of the shower base evenly, protecting the underlying floor structure and preventing potential damage over time.
What do you put on the bottom of a shower floor?
A non-slip shower mat or textured surface is typically placed on the bottom of a shower floor. This helps enhance safety by providing traction and reducing the risk of slips and falls. The mat or textured surface creates a more secure footing and improves the overall showering experience by minimizing the potential for accidents due to a slippery surface.
How do you waterproof the bottom of a shower base?
You can use a combination of techniques to waterproof the bottom of a shower base. Firstly, install a waterproof membrane or liner beneath the shower base to create a barrier against water penetration. Ensure it covers the entire base area and extends up the walls to the recommended height. Next, following the manufacturer’s instructions, apply a waterproofing coating or sealant over the shower base, including seams, corners, and edges. This additional layer of protection helps prevent water from seeping through the base and causing damage to the underlying structure.
Final Word
Installing a shower base on a wooden floor is not simple unless you know how to do it. And to give you complete awareness, we have explained each step of fixing a shower pan on a wooden floor in this article. Give extra attention while following the steps because any wrongdoing can result in costly replacement for you.
I hope this article helps you in some way with how to fix a shower pan on a wooden floor. If yes, do check out other interesting posts on my blog.
Read More: Pebble Shower Floor Pros and Cons